

Would you like to know a fun fact? I made my own wedding cake.
It was definitely not the plan all along! We had planned for a friend to make it, but she was unexpectedly unable to make it to the wedding. So a few days before my wedding, I found out I needed to make it, and started baking.
It actually was a really fun process for me! I had experience making wedding cakes in the past and knew I could do it. So for me, it was a stress reliever throughout the week and a really fun task! But if you have never made a wedding cake before, I would recommend finding a last-minute baker to do it for you!
When I found out that I was going to need to make the cake, I did not want all the flood of comments from friends and family about how it was a bad idea. I also did not want any help or suggestions because that would have made it stressful to me. But I was with people all day long! So, my only chance to bake was late at night after everyone had gone home. The only people who knew were my mom and one of my brothers (not even William) and they would help cover for me, if I needed them to.
So away I baked! I started the cake on Wednesday and froze the cake layers. Thursday night, I stacked and crumb-coated the three individual tiers and put them back into the freezer. Friday after our rehearsal dinner, I picked up the cakes and my mom and I drove 40 minutes to our Airbnb (right by our venue). We spent the night there. Saturday, the morning of my wedding, I ran over to the venue and finished frosting, stacking, assembling, and decorating it before the bridesmaids showed up.
The bridesmaids showed up and we started on hair and makeup, watched Pride and Prejudice (because what else would we do?!) and pretended like nothing ever happened! It wasn’t until our first dance that I told William I made the cake. He shook his head and laughed at me and told me it looked beautiful. My mom announced to the guests that I made the cake, and you have never seen the plates fly off the table so fast!
I know it is traditional for the top tier of a wedding cake to be saved, frozen, and eaten at your one year anniversary. But I just think that is gross. There are not many things made without preservatives that are made to be frozen that long! So instead, we ate our cake at our 3 month anniversary and enjoyed every second of it. It was still delicious.
Personally, I think it would be simpler to just make a new cake at your one year anniversary to enjoy. And that is exactly what we did.
So, I thought it was only appropriate for me to share my white wedding cake recipe. This is the exact recipe I used for my cake on our wedding day. I hope you will enjoy it as much as I do!
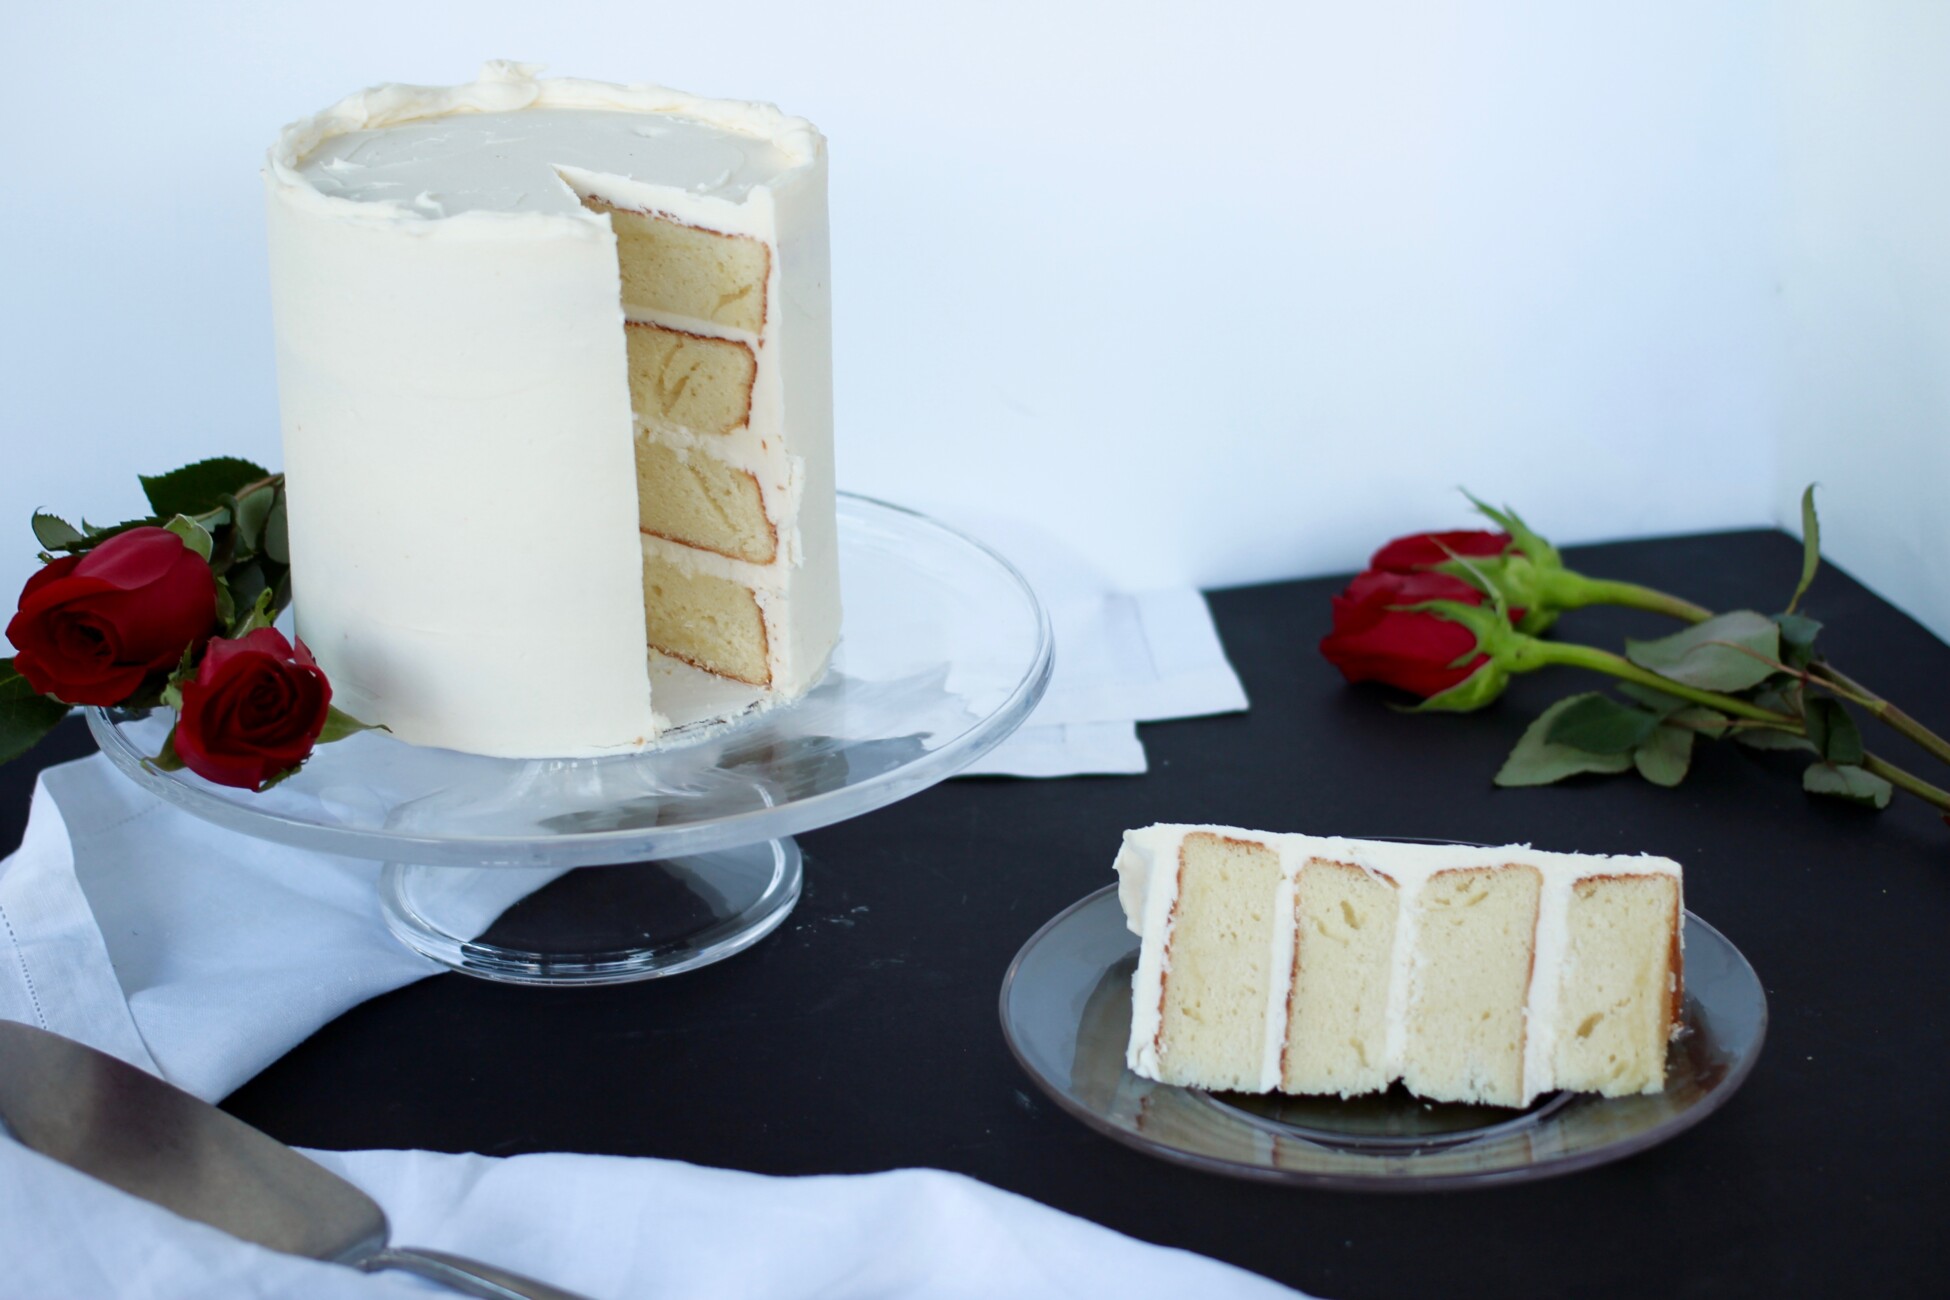
P.S. If you want to see a picture of my actual wedding cake, scroll to the bottom of the page!
Print Recipe
White Wedding Cake
Ingredients
- 4 large eggs
- 2 large egg yolks
- 1/4 cup sour cream
- 1 tablespoon vanilla extract
- 3 cups cake flour, sifted
- 2 cups granulated sugar
- 1 tablespoon baking powder
- 1 teaspoon salt
- 1 cup buttermilk (full-fat)
- 1 cup butter (2 sticks), softened
Instructions
- Preheat the oven to 350 degrees Fahrenheit. Grease four 6" or two 8" cake rounds. Line the bottom of the pans with circles of parchment paper for further stick-prevention.
- In a medium mixing bowl, combine the eggs, egg yolks, sour cream, and vanilla. Whisk until well combined. Set aside.
- In the bowl of a stand mixer, add the cake flour, sugar, baking powder, and salt. Add in the butter in approximately 1 tablespoon pieces. With the paddle attachment, slowly start to combine the butter and flour on low (to ensure the flour does not puff up).
- Once the butter and flour mixture have begun to incorporate, turn the mixer to medium high. Pour the buttermilk into the mixer in a steady stream. Continue to beat until the entire mixture is smooth and fluffy, about 2-3 minutes. The mixture will have lightened in color.
- Stop the mixer. Gently pour in 1/3 of the egg mixture into the stand mixer. Turn the mixer on low and stir until combined. Scrape down the side of the bowl and repeat this step 2 more times, until all of the egg mixture has been fully incorporated.
- Remove the bowl from the stand mixer. Scrape down the sides of the bowl to ensure there are no clumps of butter remaining. If there are, beat the mixture by hand with a spatula until smooth.
- Divide the batter into the prepared baking sheets. Bake for 25-30 minutes. Additional time may be needed for the 8" cake rounds, depending on the depth of your pan. Do not worry if it takes up to 40 minutes.
- When a toothpick inserted comes out clean, remove the pans from the oven. Let the cakes cool for 5-10 minutes in their pans, then flip the cakes out onto a cooling rack.
- Once the cakes are completely cooled, frost with your favorite frosting!